Using IntelliJ
This section describes how to install and setup JetBrains' IntelliJ IDEA, then how to import an application into IntelliJ and run it.
Installing and Importing
This section covers installation and setup. These notes/screenshots were prepared using IntelliJ IDEA Community Edition 2023.1.2, but is believed to be compatible with more recent versions/other editions of the IDE.
Download and Install
Download latest version of IntelliJ Community Edition, and install.
Import Project
In IntelliJ a project can contain multiple modules; these need not be physically located together.
Download either the HelloWorld or SimpleApp starter app to your filesystem.
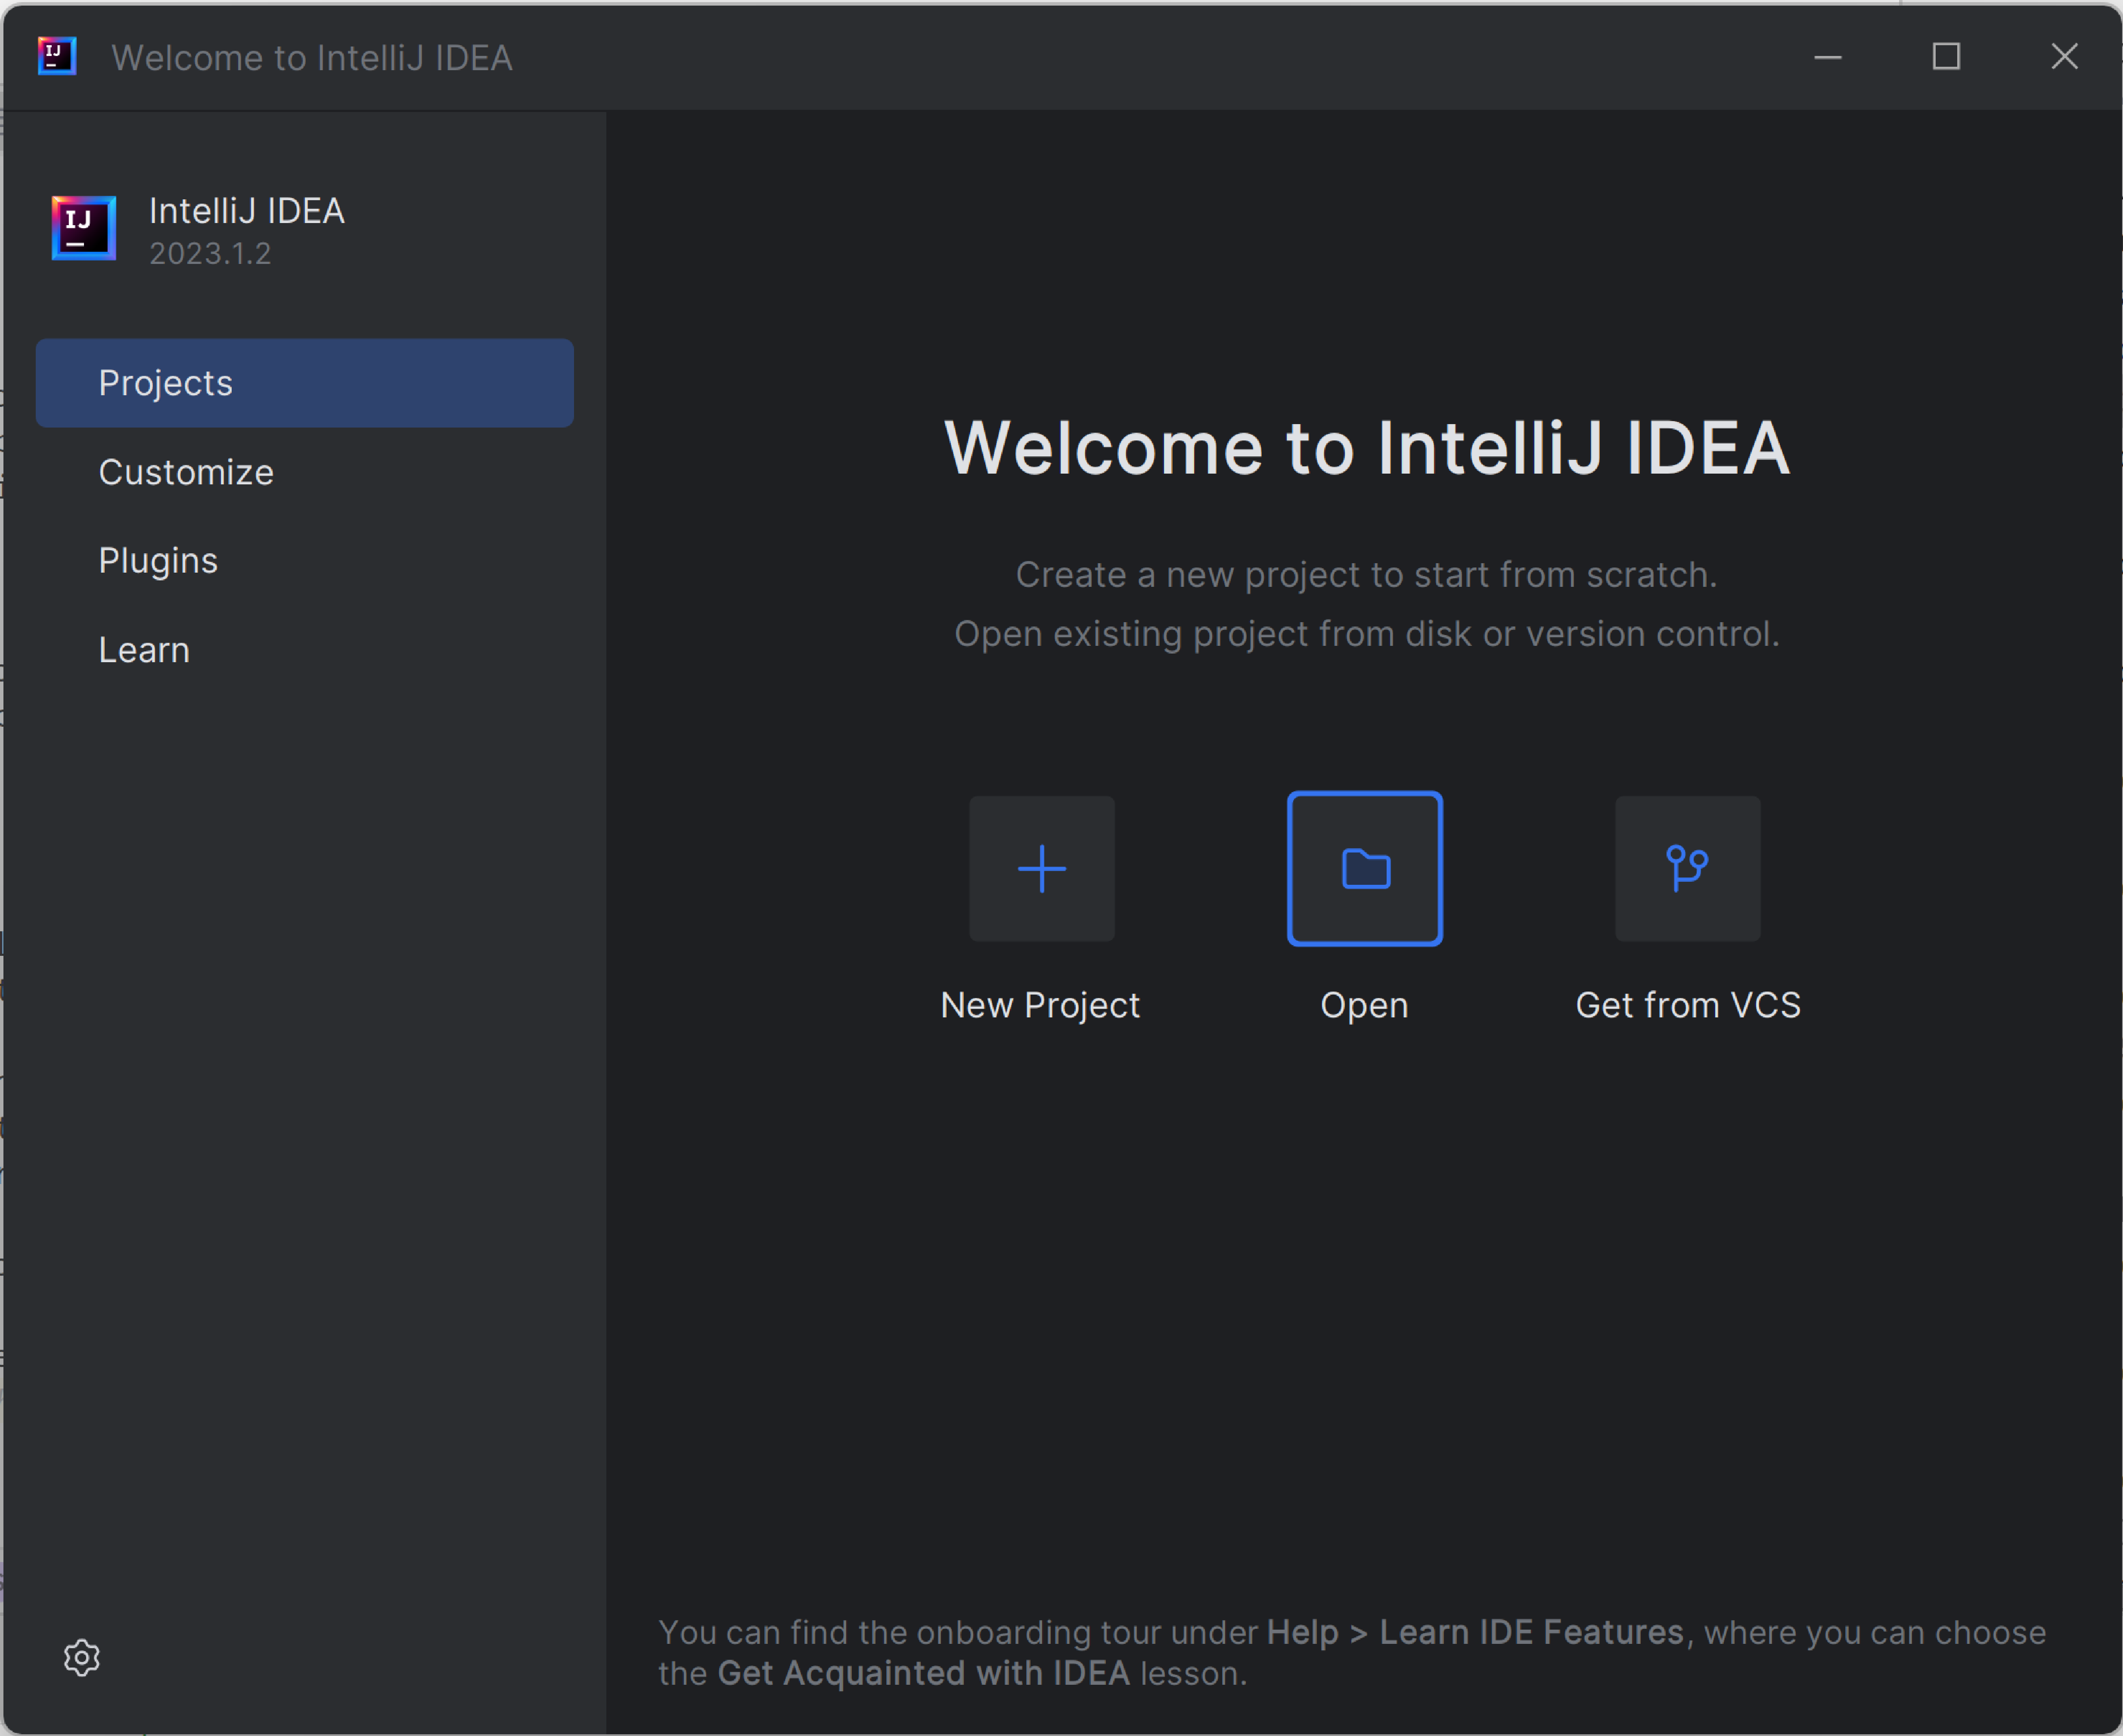
From the welcome screen, select "open project":
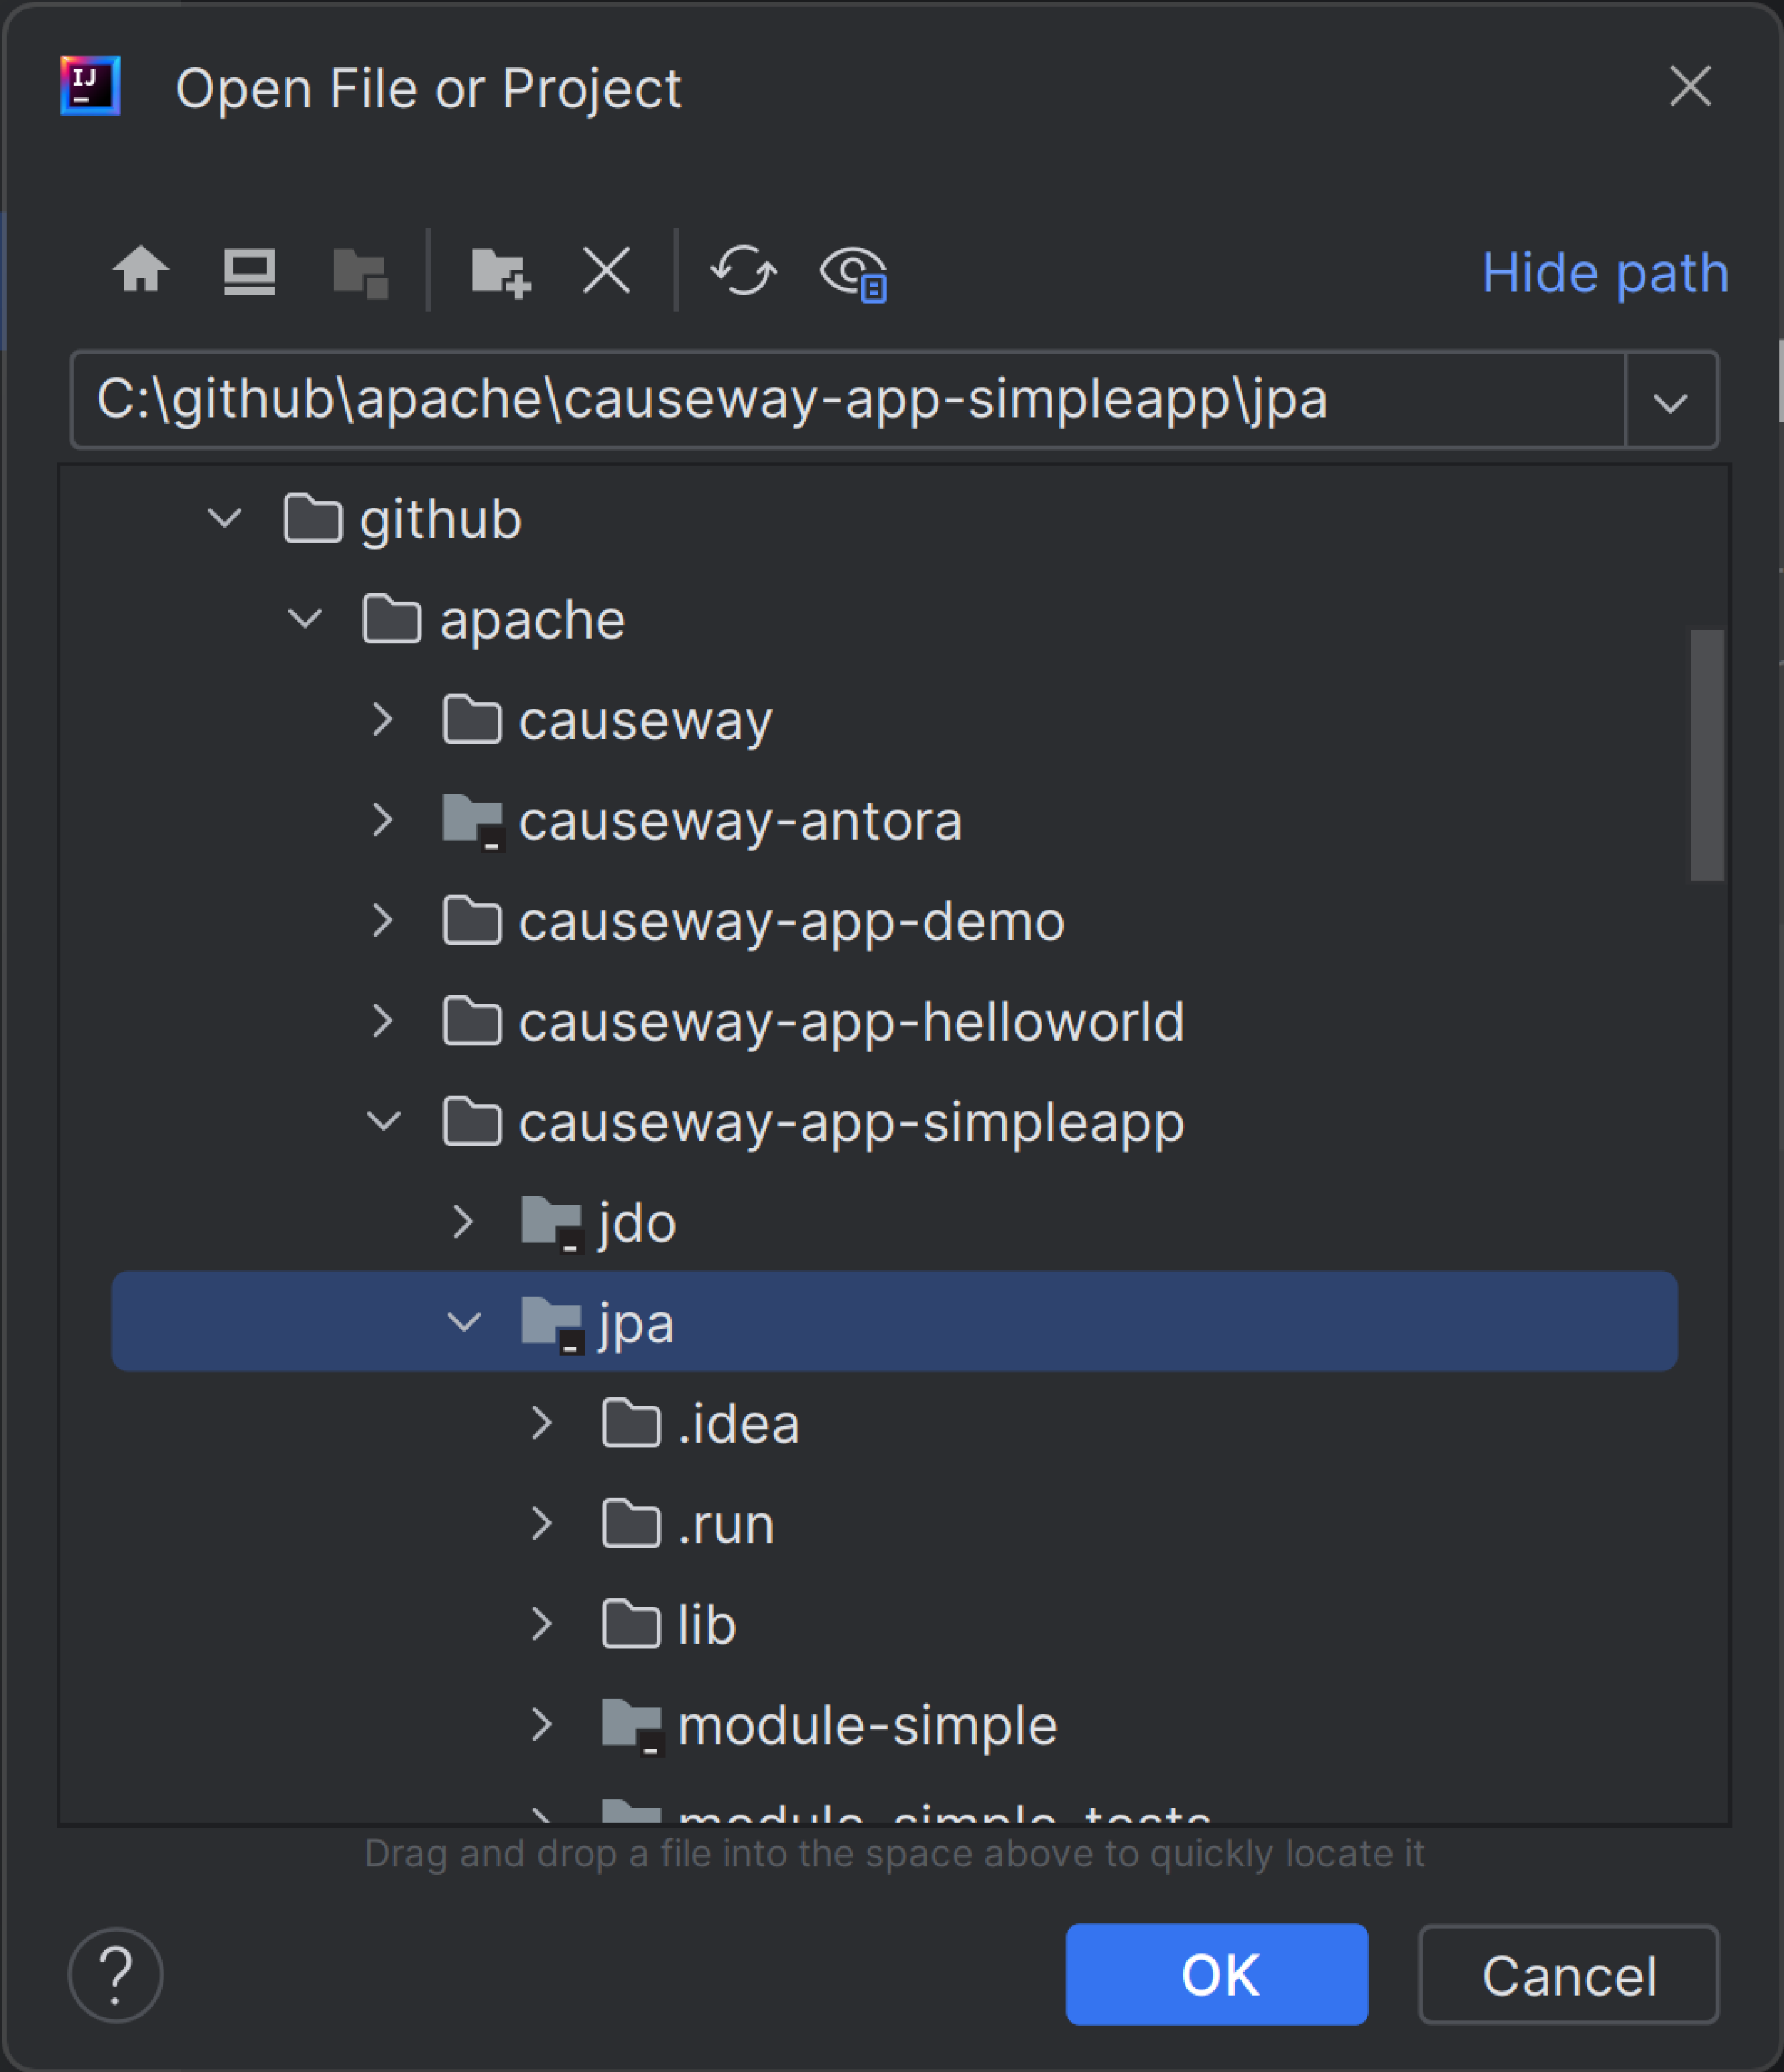
Navigate to the top-level pom.xml of the starter app:
Acknowledge that the containing directory can be trusted:
Project opened:
Use to confirm that JDK 11 is configured:
Configuring
Compiler Settings
There are a number of compiler settings that influence the compiler. We highly recommend you set these.
On the Compiler Settings page, ensure that build automatically is enabled, and optionally compile independent modules in parallel.
You might also want to increase the heap size, eg to 2048.
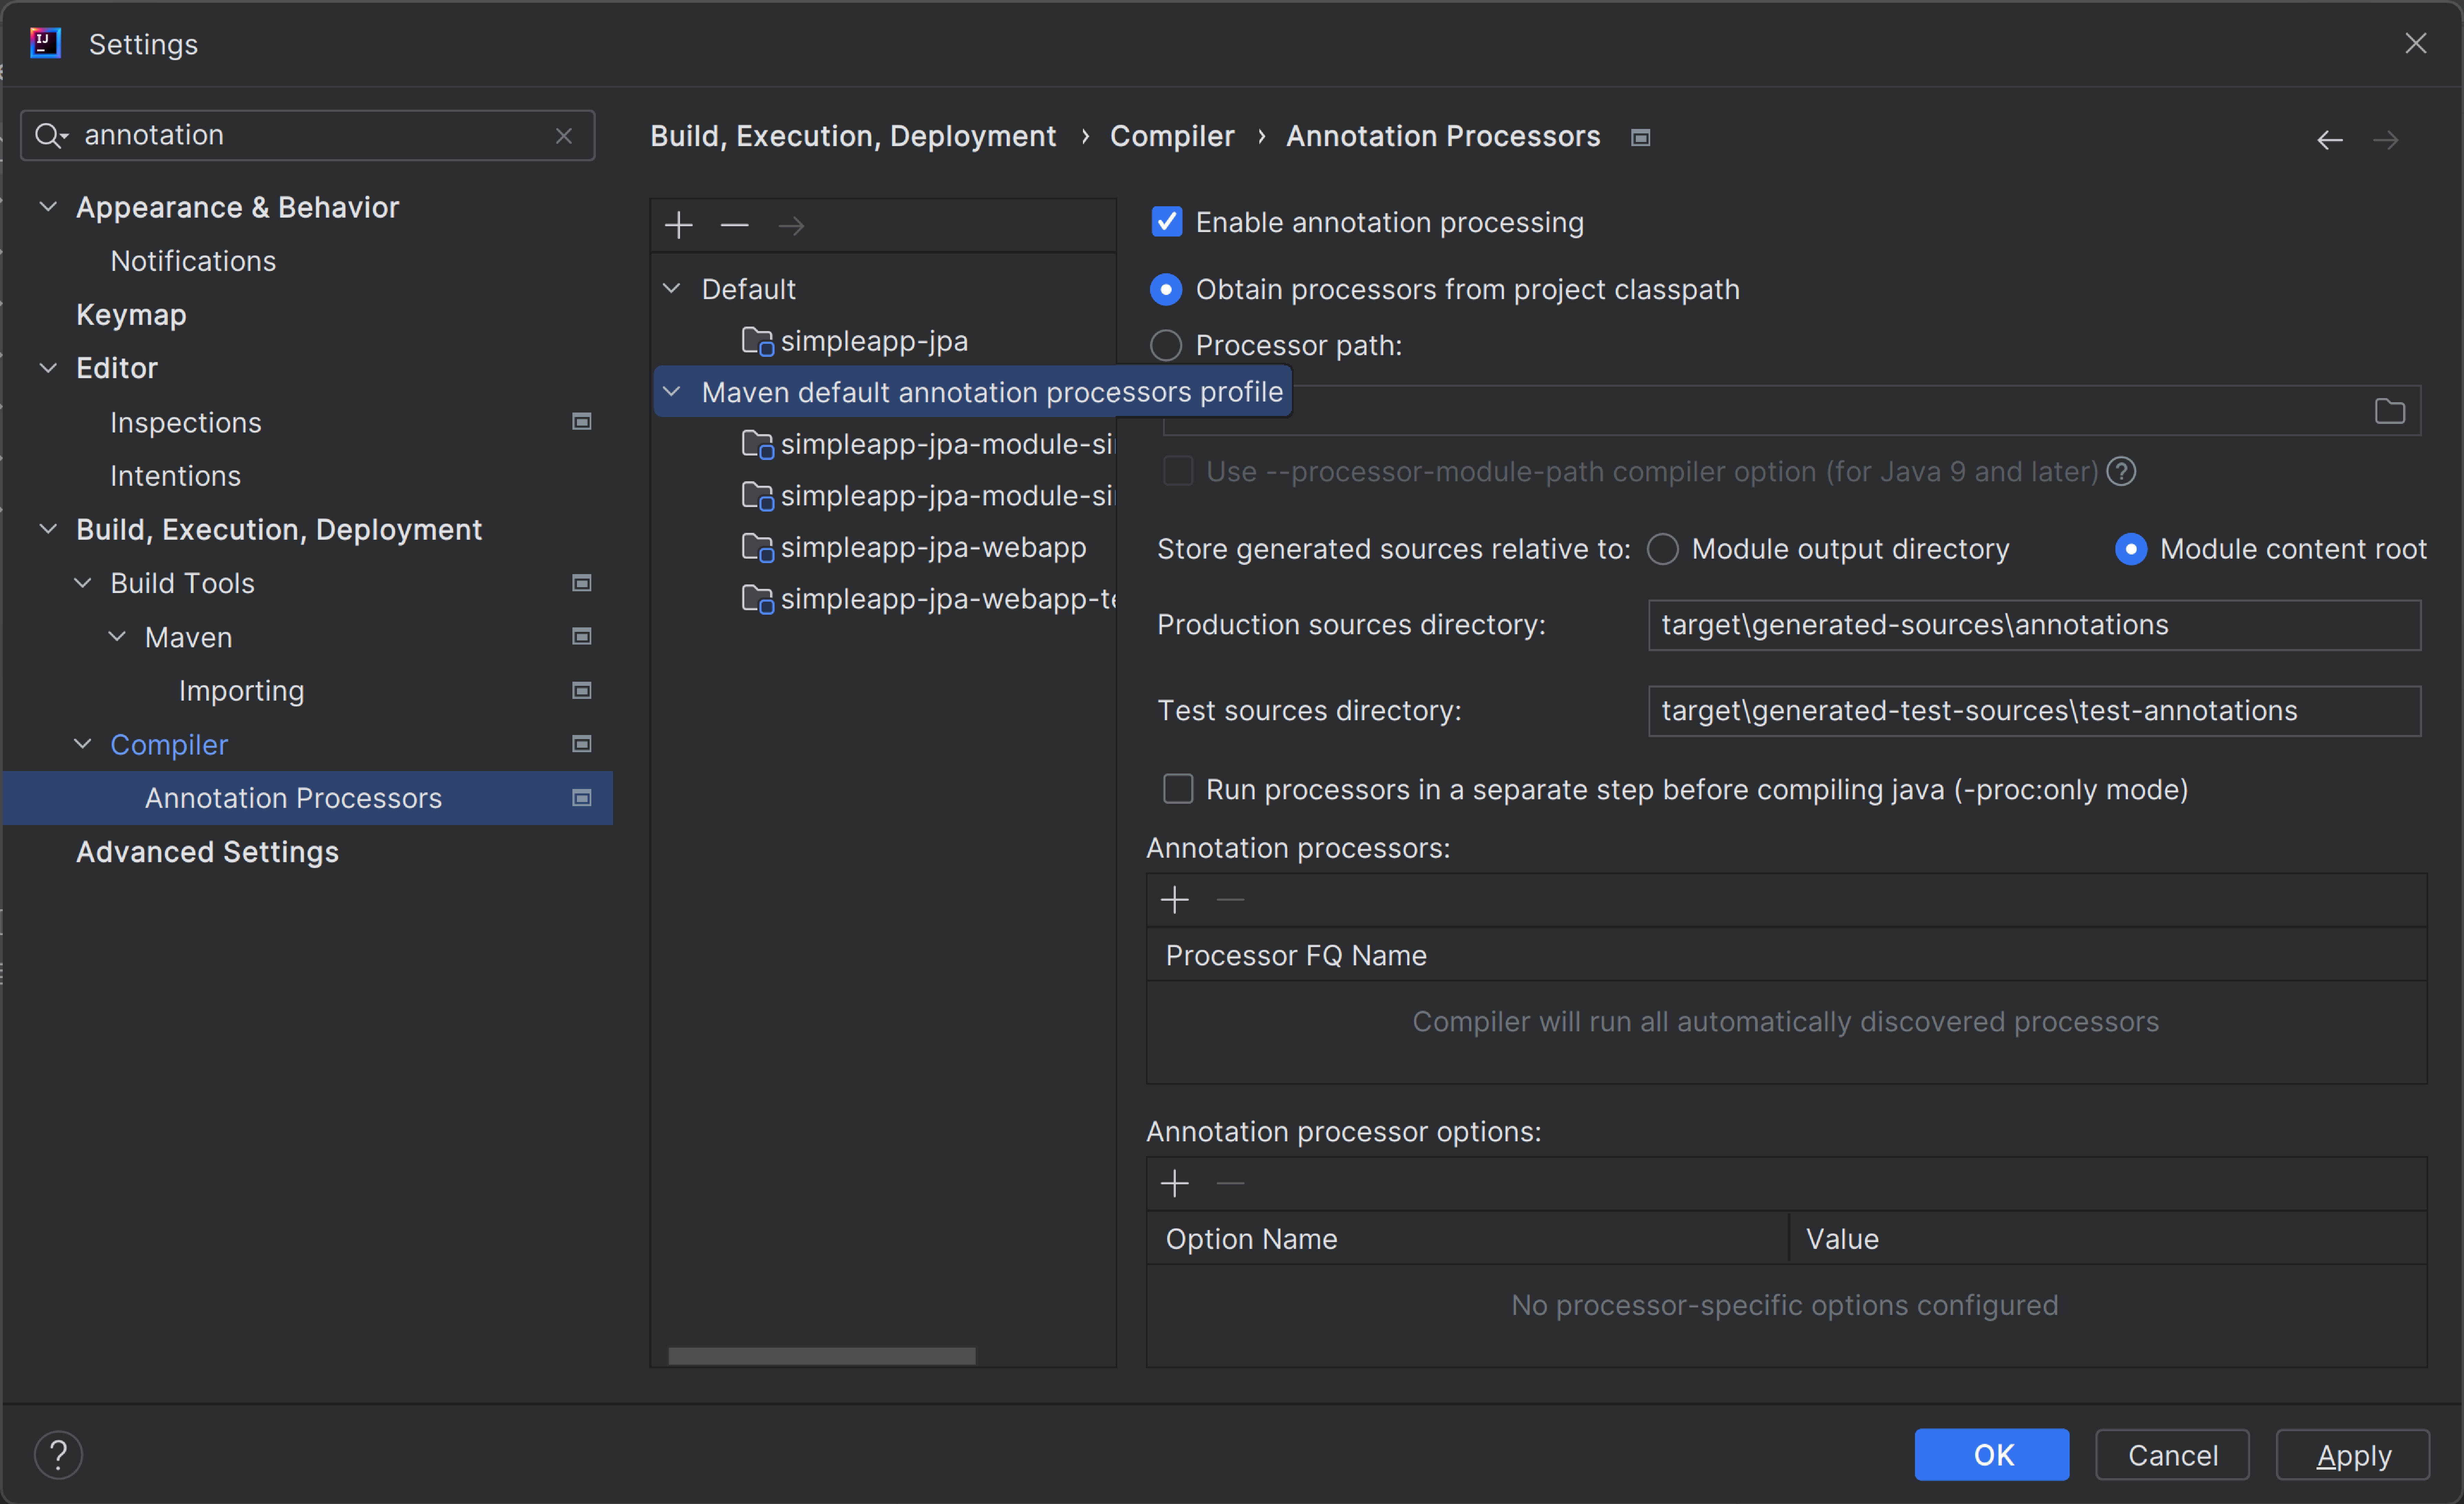
On the Annotation Processors page, confirm that these are enabled for all modules with the … sources directory correctly defined.
(In most recent editions of IntelliJ, this is detected automatically; no changes are required).
|
If using QueryDSL, this setting enables the generation of the It is also required for frameworks such as Lombok. |
Plugins
You might want to set up some additional plugins.
You can do this using File > Settings > Plugins (or equivalently File > Other Settings > Configure Plugins).
Highly recommended are:
-
Lombok plugin (bundled with the IDE, and pre-enabled)
If you plan to use Project Lombok to reduce boilerplate.
-
Maven Helper plugin
-
AsciiDoctor plugin
Extremely useful if you are doing any authoring of documents (plugin’s git repo is here)
-
diagrams.net plugin * Allows diagrams to be authored within the IDE; works well with the AsciiDoctor plugin.
Running
Let’s see how to run both the app and the tests.
We run the application by creating a Run configuration, using Run > Edit Configurations.
We also configure dynamic class weaving for the JPA/EclipseLink ORM.
Running the App (JPA)
The screenshot below shows a run configuration for JPA:
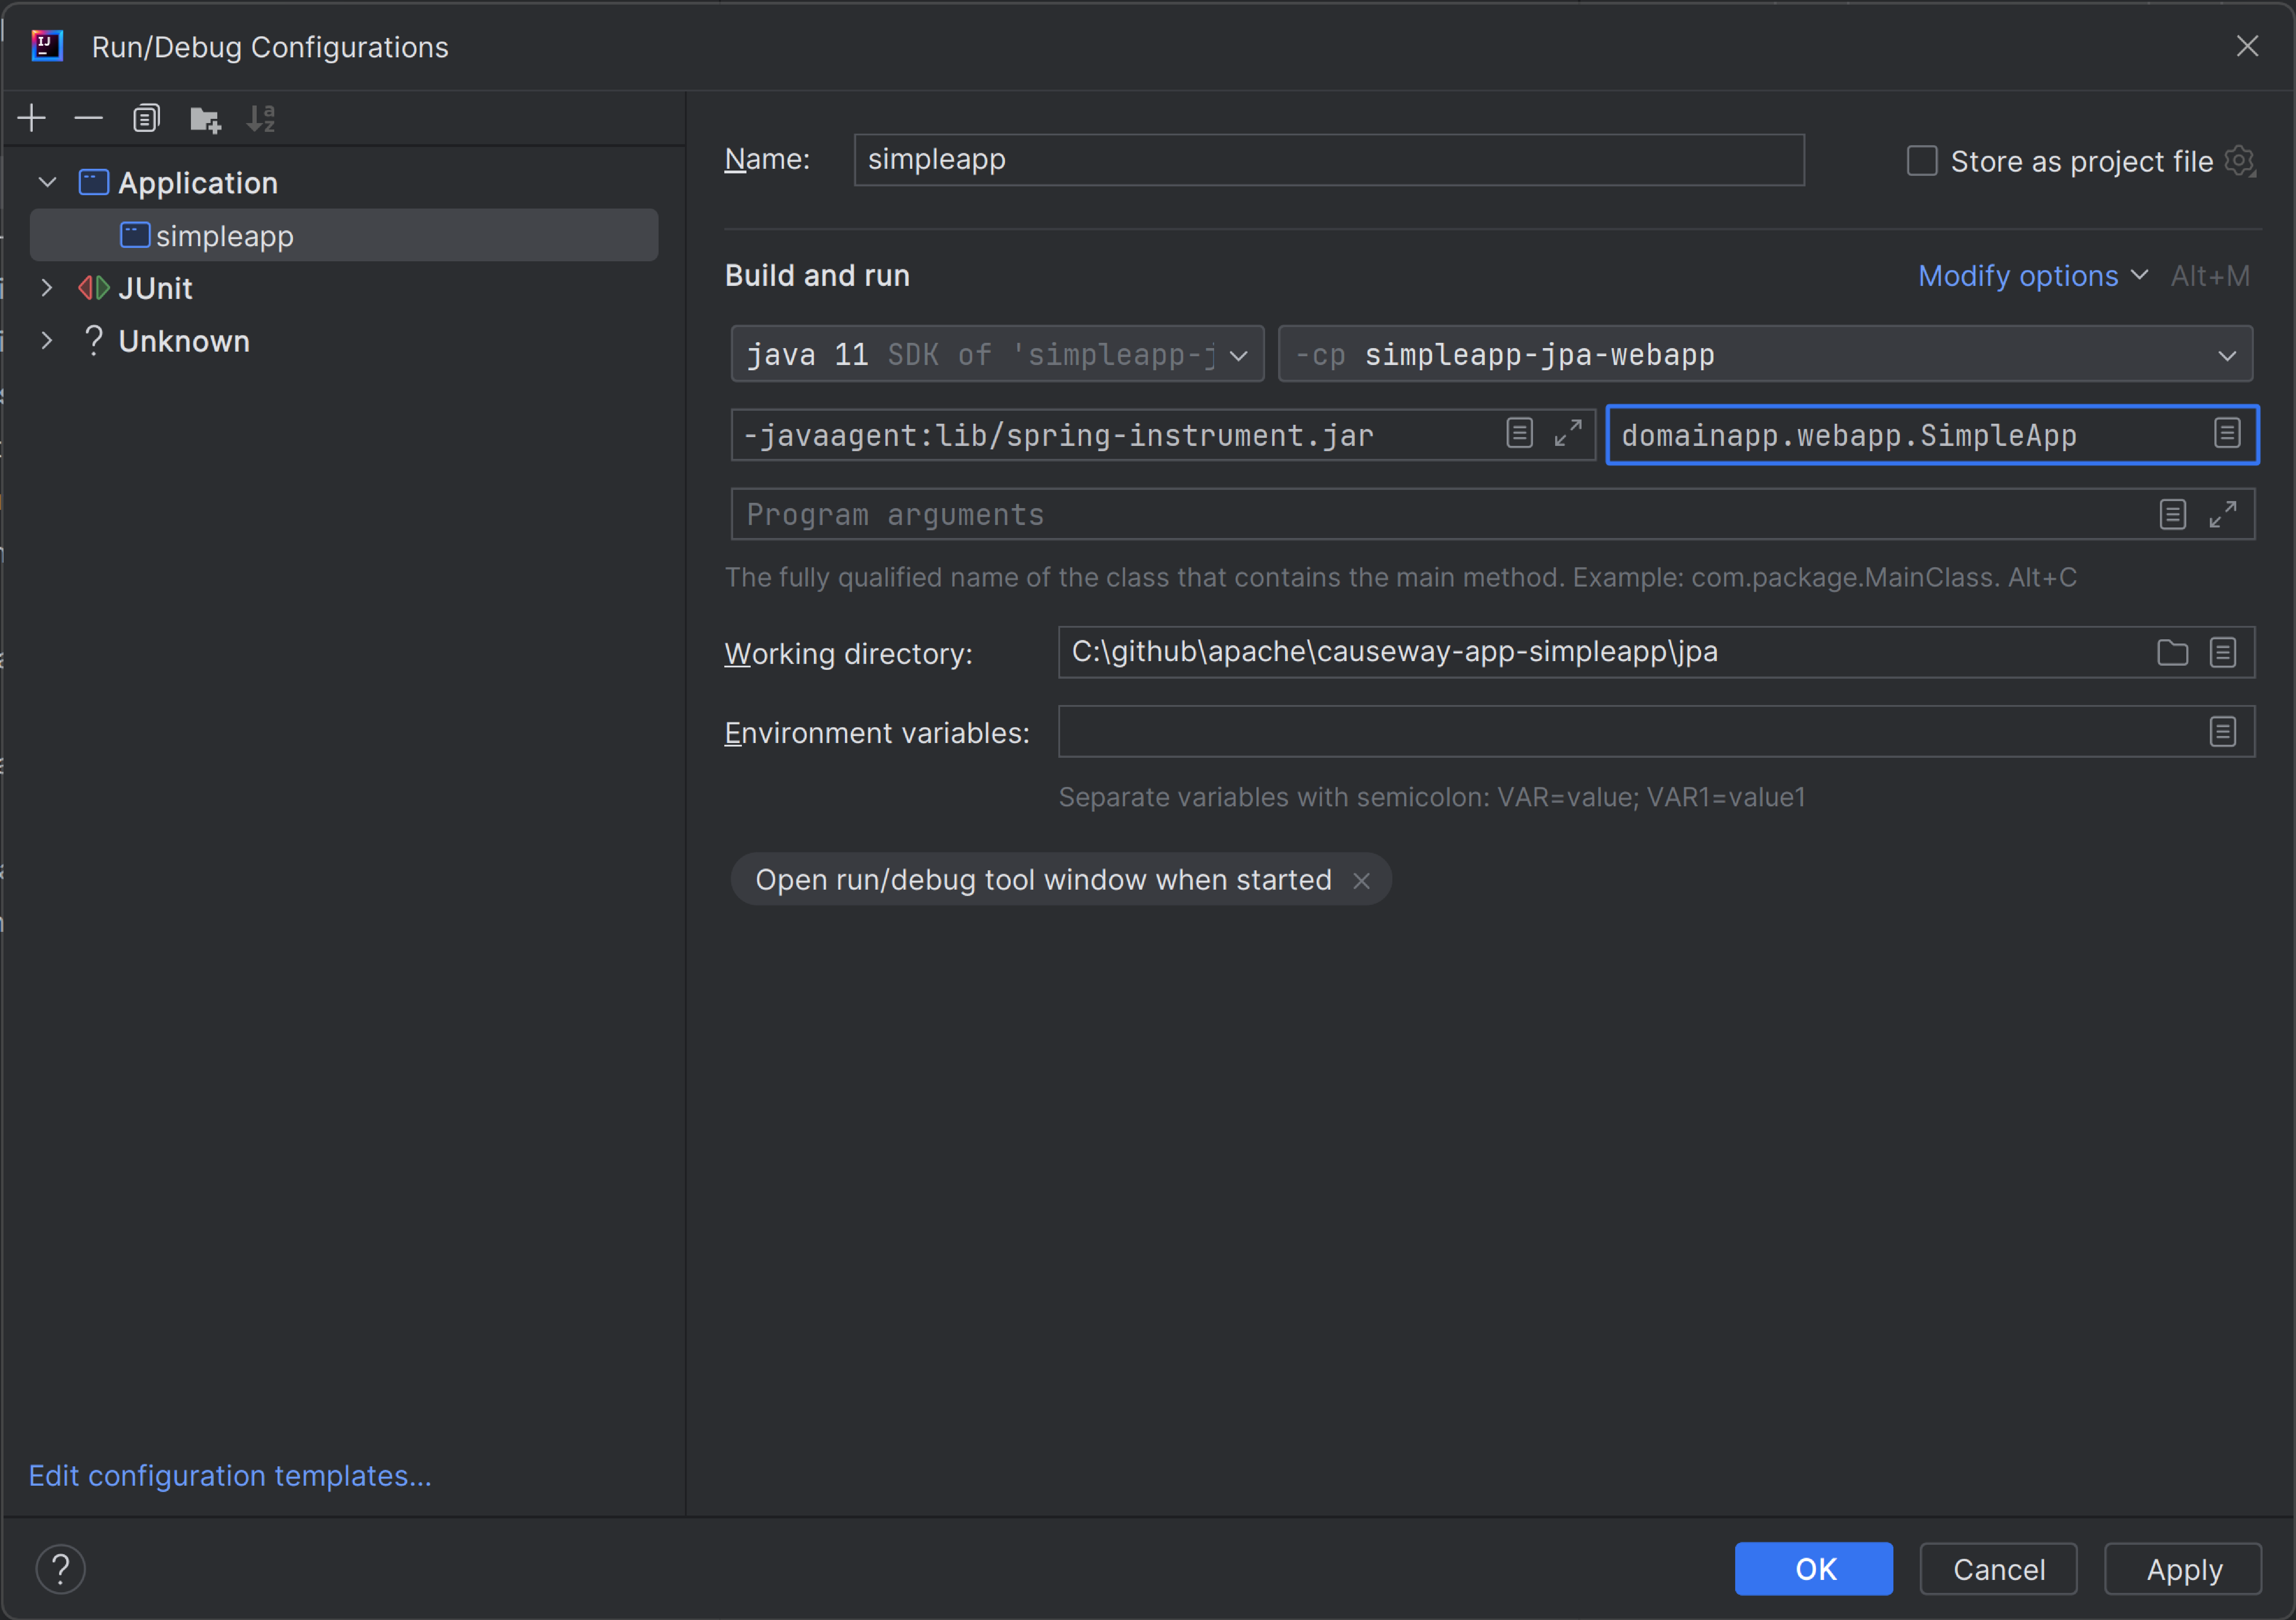
With JPA/Eclipselink, the classes can optionally be "weaved" in order to support lazy loading and (more performant) dirty object tracking.
This is typically done dynamically at runtime, using a Java agent.
The SimpleApp and HelloWorld starter apps demonstrate this, bundling the spring-instrument.jar file.
To run, use:
-javaagent:lib/spring-instrument.jaras a JVM argument (where the system properties also are located.)
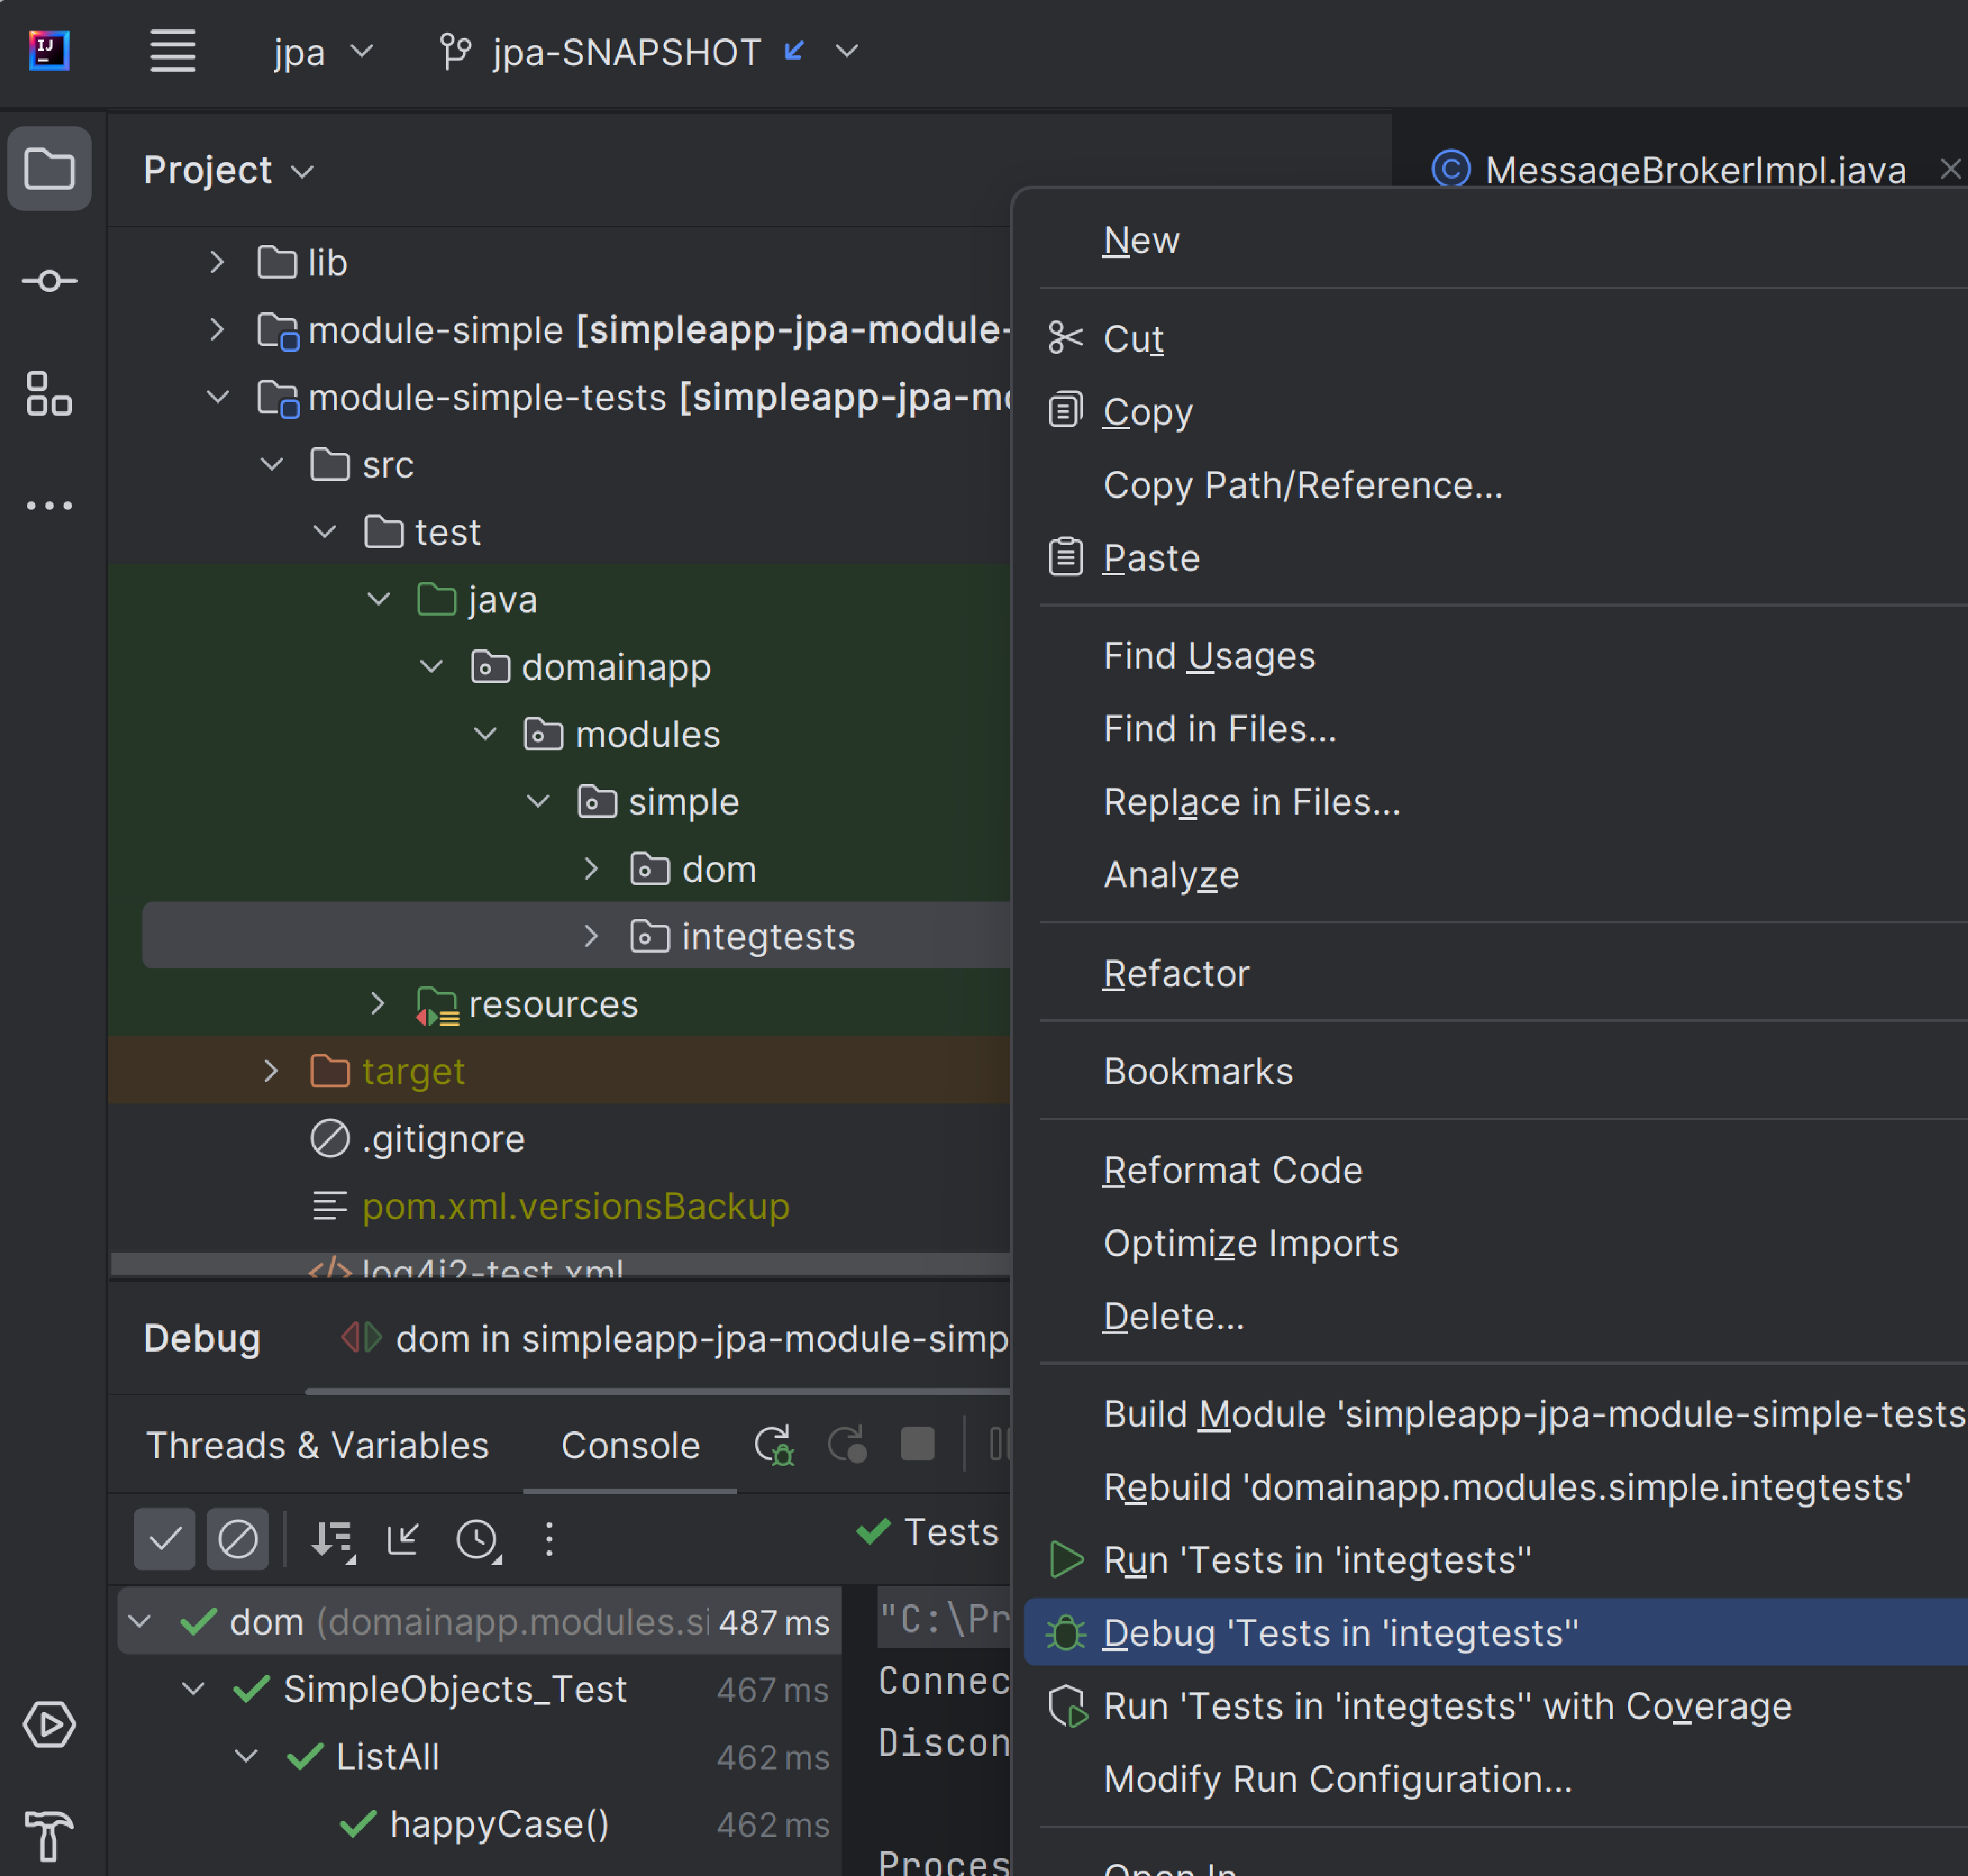
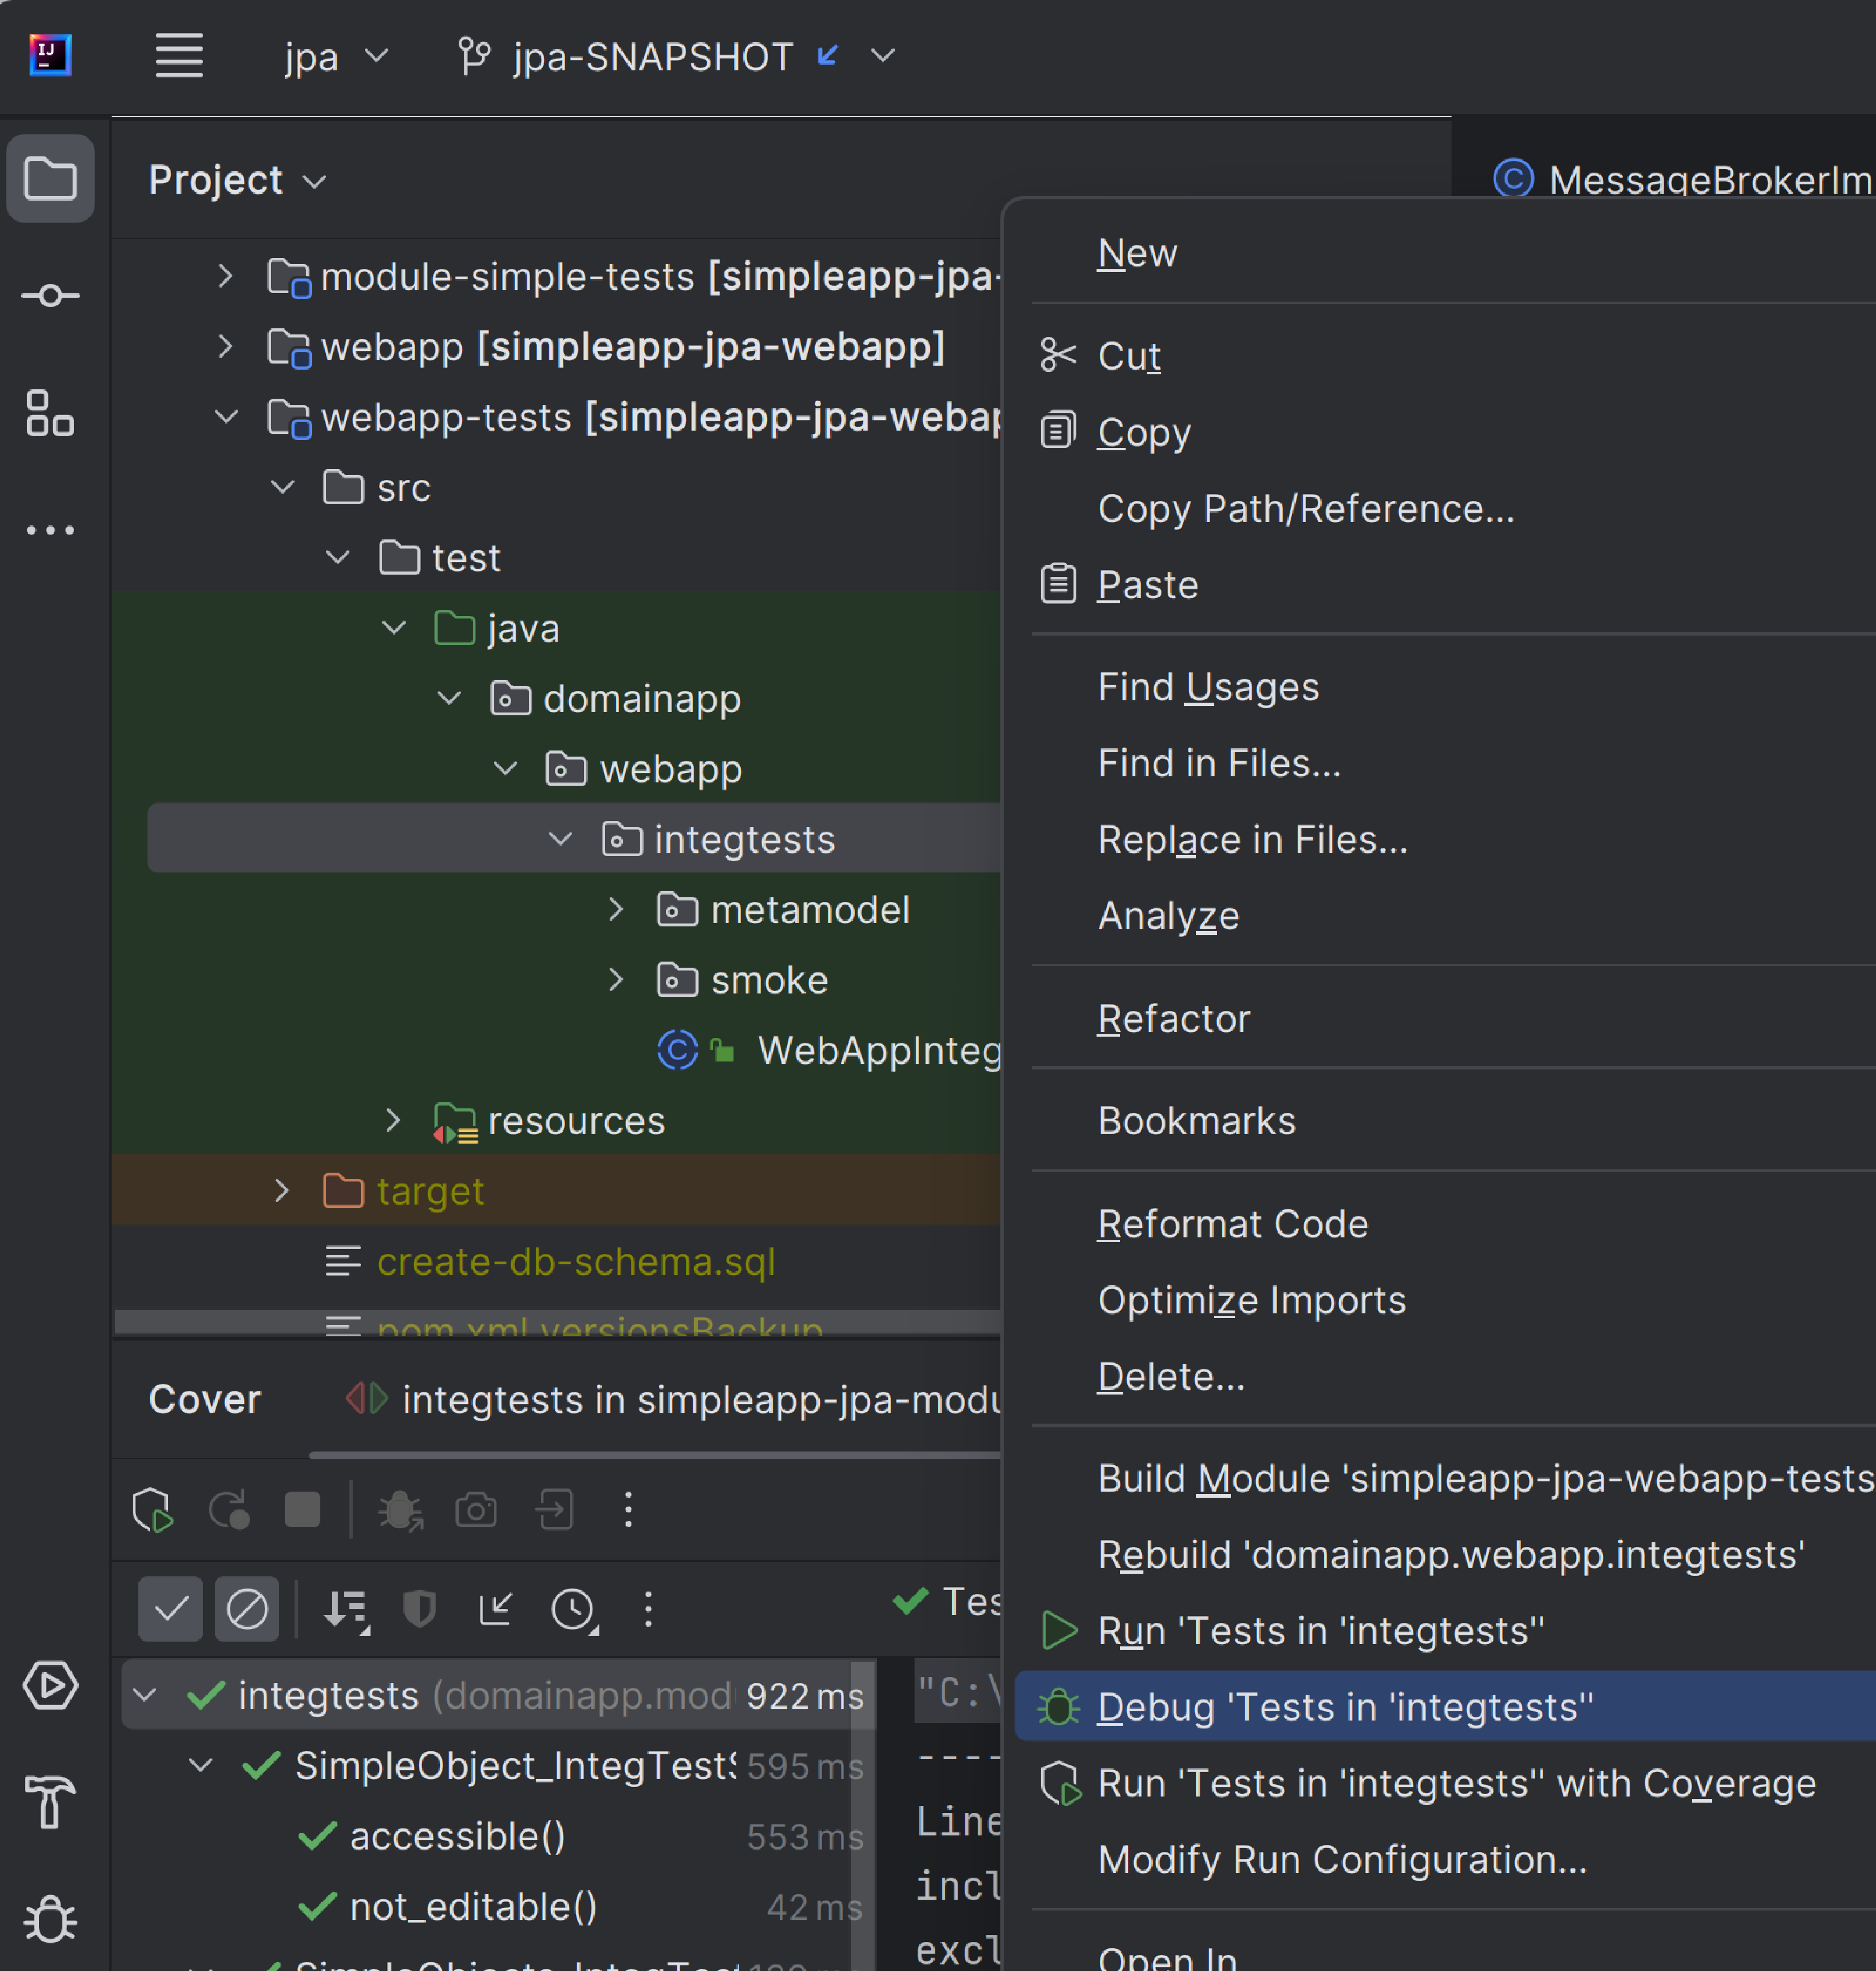
Running the Unit Tests
The easiest way to run the unit tests is just to right click on the relevant package in the Project Window, and choose run unit tests. Hopefully your tests will pass (!).
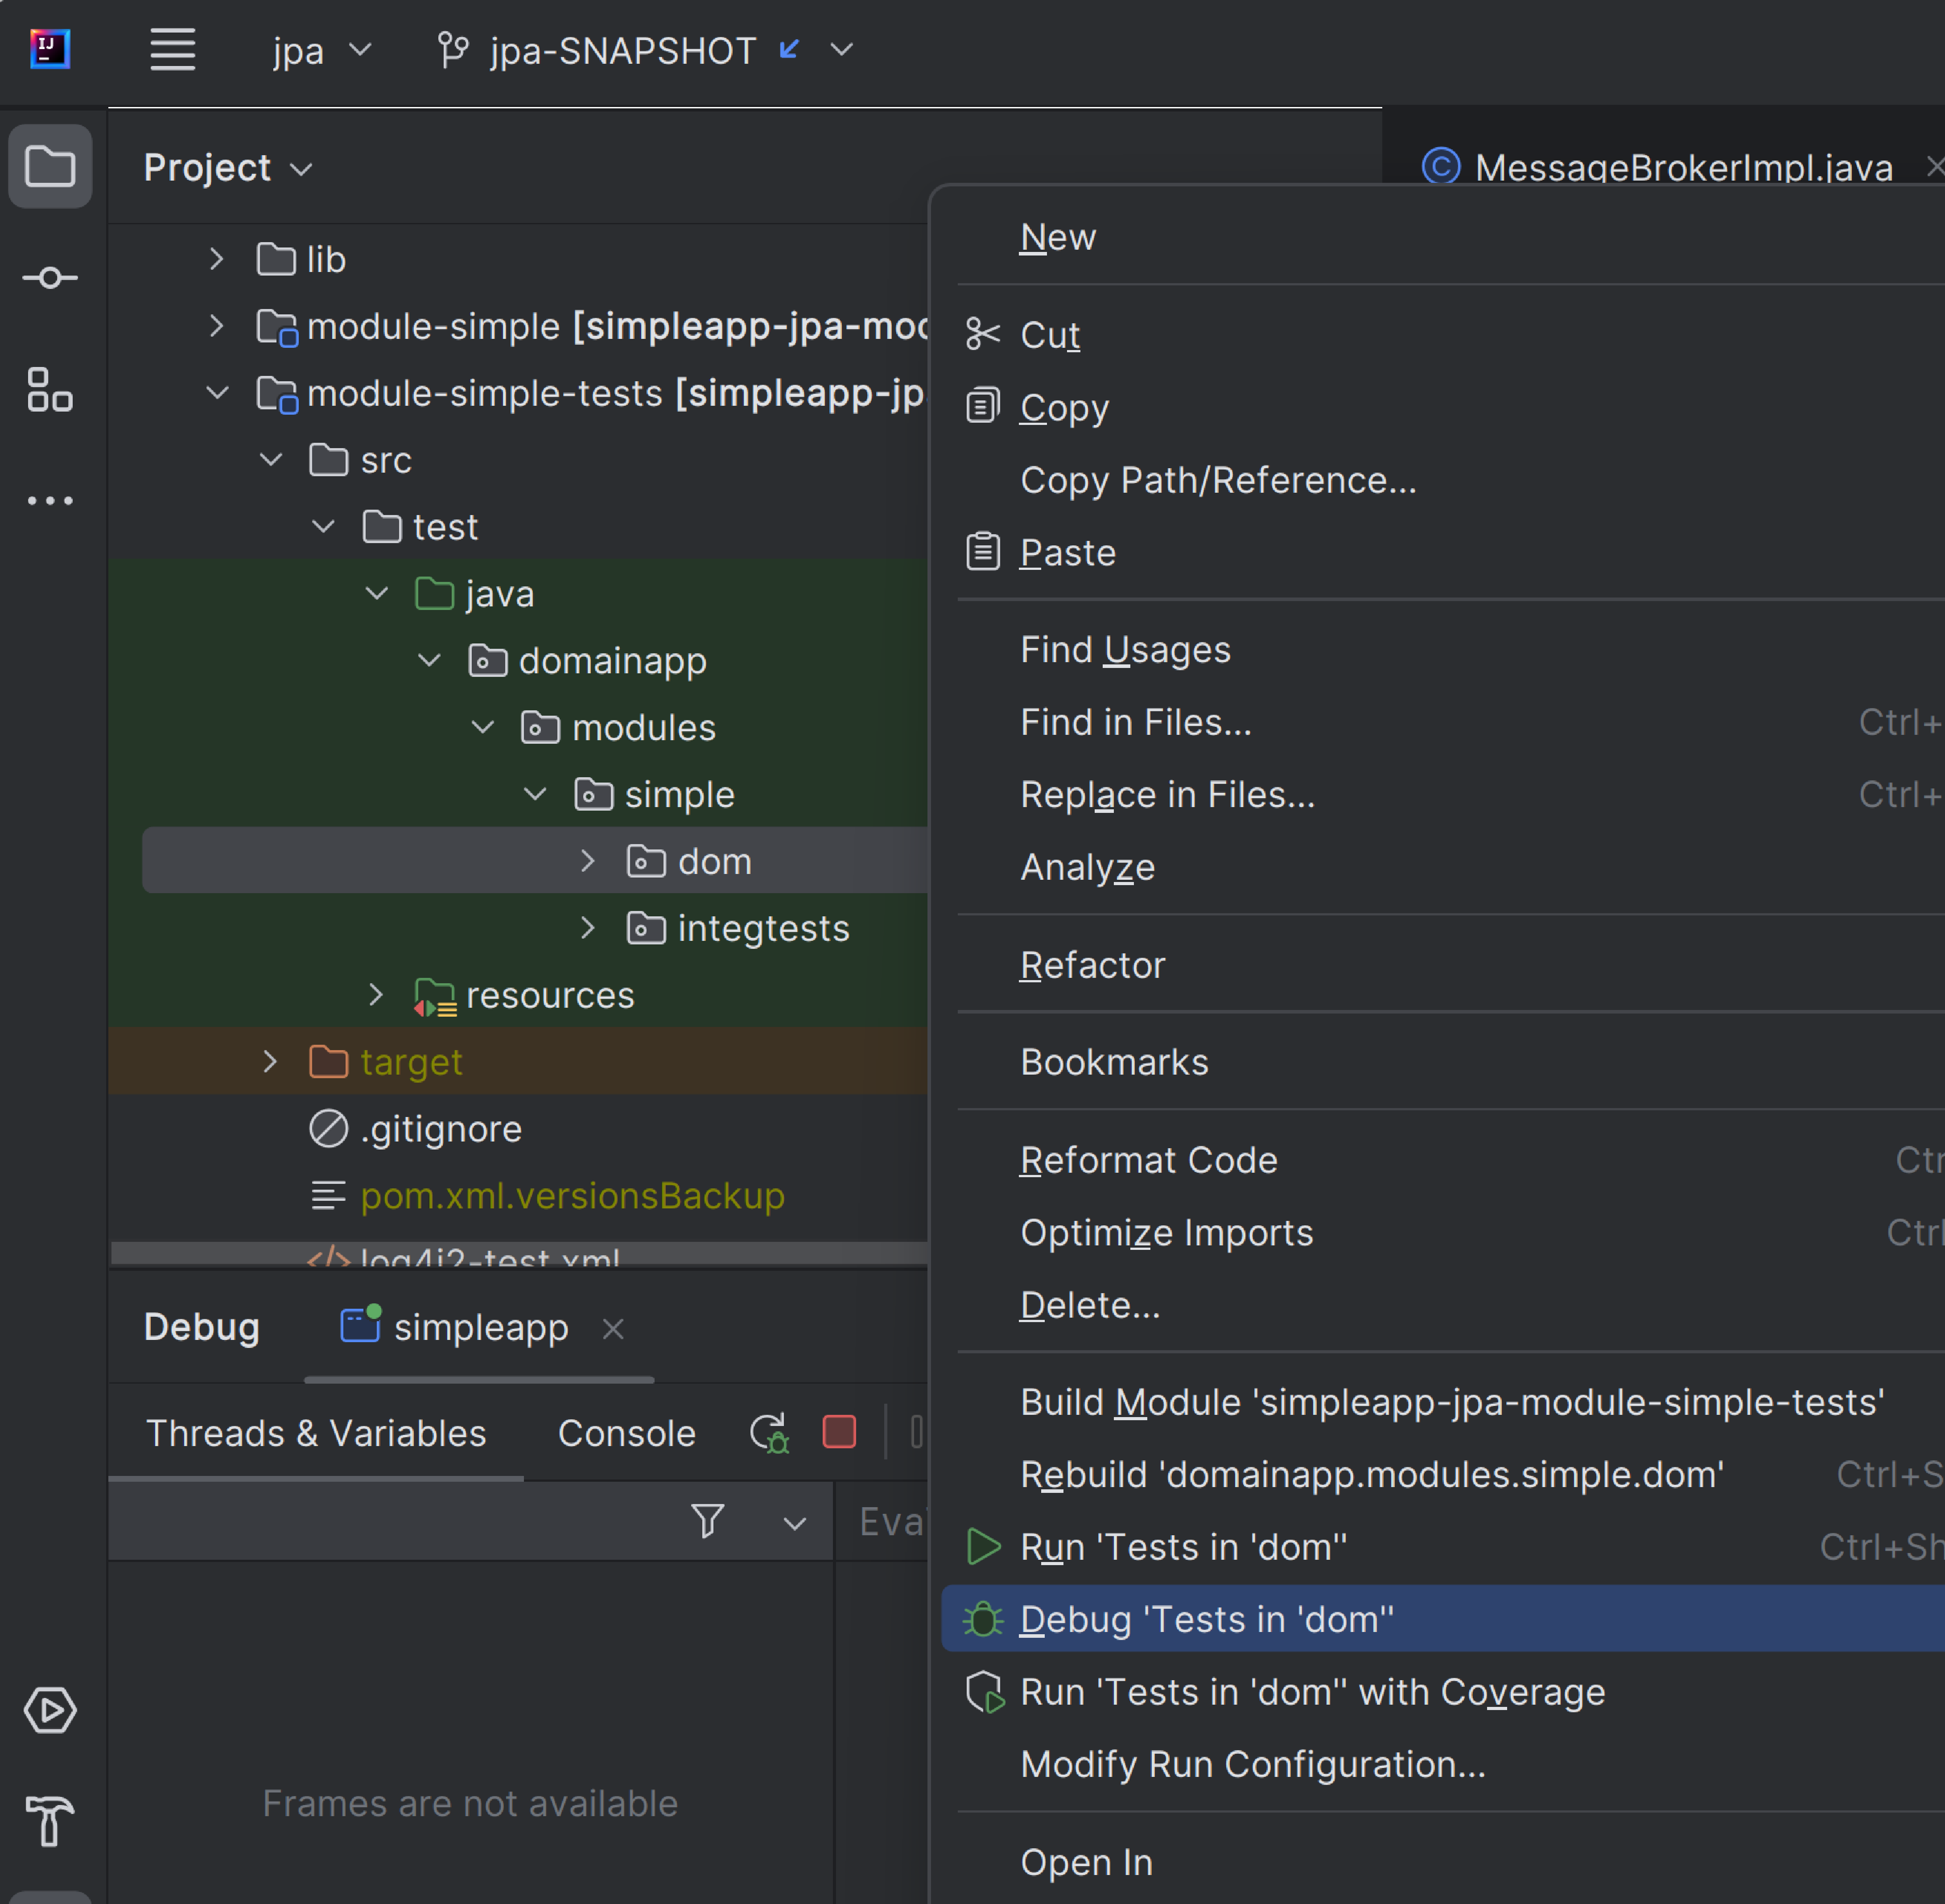
As a side-effect, this will create a run configuration, very similar to the one we manually created for the main app.